- Author Nora Macey macey@family-relation.com.
- Public 2023-12-16 10:17.
- Last modified 2025-01-23 08:48.
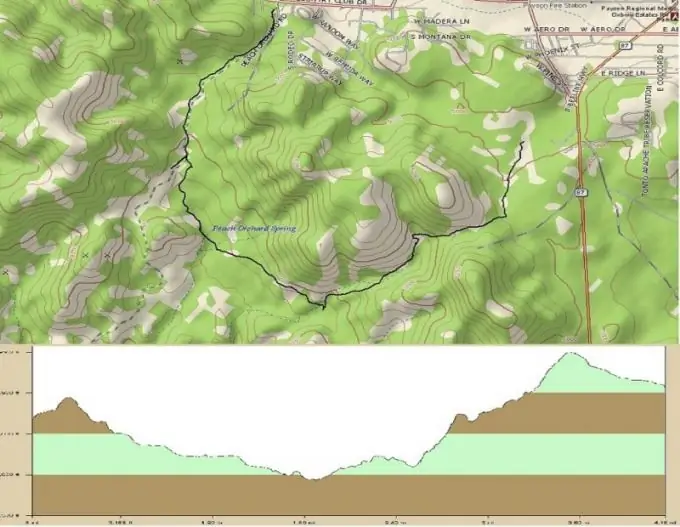
The question of how to build a longitudinal profile can arise when designing and building a road, laying a ski track or trajectory along a certain route. It is a projection of the axis of this road, route, route onto a vertical surface passing through their axis. This is only a flat pattern on a vertical surface, so its projection onto a horizontal plane can be either a straight line or a winding line.

Necessary
- - topographic scheme of the terrain on a scale of 1: 500 - 1: 10000,
- - ruler,
- - pencil,
- - blank sheets of paper.
Instructions
Step 1
You can build a longitudinal profile using any topographic map of the area where the projected road, alignment or route is located. It must necessarily have a certain scale and elevation marks, expressed in contours. The larger the scale of such a scheme, the more accurately you will design the longitudinal profile.
Step 2
Draw the axis of the road or route of the path on the diagram to simplify the task, break it into short straight segments, each of which is measured with a ruler with millimeter divisions. Number the key points of the route. Measure each line to the nearest tenth of a millimeter. Write down the length of each segment on a separate sheet, fold it and determine the total length of the route in millimeters. Knowing the scale of the map, determine its duration in kilometers.
Step 3
Walk mentally along the route marked on the map and determine the minimum and maximum elevation marks at which it passes. You can use different scale values for the horizontal and vertical axes, this will increase the visibility of the projected longitudinal profile. Usually, the vertical scale is taken as 1: 500, and the horizontal scale is 1: 5000. Select them in such a way that your profile fits in length on one, maximum - on three sheets in length, so that it is convenient to work with it.
Step 4
Draw the vertical and horizontal axes on the sheet. For convenience, they can be marked in accordance with the selected scale. Draw route points along the horizontal axis from the start to the end, successively putting them off. Along the vertical axis, plot the elevation values of each route point, which are determined by the topographic scheme on which it is plotted.
Step 5
Connect these points and you have a longitudinal profile of your route or track. By measuring the lengths of the segments along the contour of the profile, you can determine the actual duration of the route, which, due to the influence of the terrain, may differ significantly from that which was measured on the topographic map.


